
 Login
Login

You finally put your form together. You sent it out to all of your personnel, and they’re all happy with the results and the increase in efficiency. Paperwork is beginning to be filed automatically, and the indexed reports are making things infinitely easier to find. In a sense, the mobile form has already started to become part of your business because of how effective it was right off the bat.
But, you might still be using the Snappii Preview app, a prototype mechanism that allows you to test your app (or mobile form) as much as you want. You took advantage of it by making sure there were no superfluous fields, and not a single widget is out of place. You even went so far as to add your logo and change the colors of the app to match your business.
But what now?
Publishing an app is the final step of the app creation process. Normally, a user would have to go through the Snappii Preview app if they wanted to use an app made on our platform. By publishing, though, the app gets pushed out as its own stand-alone entity. This gives more freedom for your users to have their own personal settings within the app, including logins and profiles.

Near the bottom of the editor, you’ll see a few different options for what you can do once the app is complete. You’re probably already aware of what “Save and Run” and “Invite Users” does, but I’ll go over them again briefly here (for posterity!).
Save and Run on device
- This is where you’ll click when you’re ready to try the app out on your phone. Note that the builder does not automatically save at any point, so you’ll want to click here every once in a while to make sure your progress doesn’t get lost in case of an outage.
- You’ll also use this button after you’ve downloaded the Preview app. This will be how you refresh your changes after you make them – I’ll explain more in a bit.
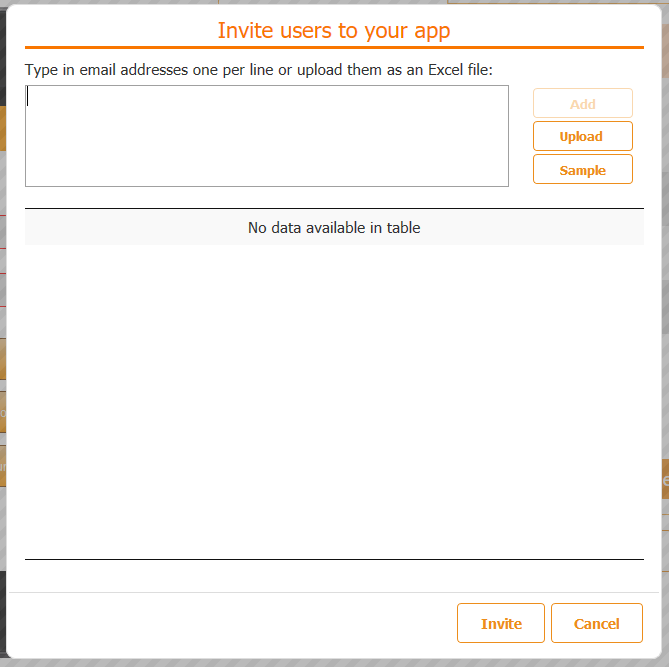
Snappii makes it easy to invite your coworkers or friends to try out an app you built. Click on the ‘invite user’ button, and this dialog will appear:
When you’re satisfied enough to push your app out into the world, the Publish button is next. Snappii’s streamlined the publishing process as much as possible. If you’re ready to go, go ahead and hit Publish and we’ll get the ball rolling.
Public, Private or HTML 5?
There are three options you can use when you want to publish your app. Each one will accomplish something slightly different, and depending on how you’re utilizing the app for your business will determine which one you need. Let’s go over them:
- Public
- A public app is an app that you can find on the app store. Any amount of people can go into the app store, type in the name of the app, and download the app to use for themselves. Public apps work great for companies that may have developed an app specifically for one purpose – like a taxi app for example. Or they can also be used as apps that supplement your marketing, like an app that gives coupons for people to use on your store front. If your app is going to be in the public eye, then publish Public is the way you want to go.
- Private
- Private is the opposite. Private apps are usually being utilizied as an internal business tool. There’s no need to put it on the app store because the only people that would use the app are the people in your business. For example, a warehouse manager might use a private app to make sure all of his employees, and himself, are on the same page. Or maybe a marijuana dispensary is using an app to track stock moving from room to room. If you’re app is going to be used as an internal tool, then you should publish it as private.
- HTML 5
- HTML 5 is the latest addition to the bunch, and adds a couple of cool features that further push the utility of the app. For starters, you’ll notice that within the editor, you have an option of seeing HTML5 preview. This mimics how the app would operate if you were to put it on your phone.
- The second benefit of HTML 5 is that you can publish a web-app version of your app. This allows users to use the app right from their computer, rather than restricting access to a mobile device. For people in the headquarters working with the app, this tool can prove invaluable for the amount of time it can save.
Aside from the actual publishing process, you also have to pay for a developer license for whichever market you’re going to be placing your app in. The developer license is a yearly subscription to each of the app stores which gives you access to the analytics of your apps. It’s very useful for figuring out what you’re target market is, as well as weighing reviews as responses to your app. Check out the FAQ on how to get your developer’s license here.
For private and HTML5, that’s the end of the line. Nothing else is required as long as you’re paying the subscription. For public, however, there’s a few extra steps in addition to the developer license that you need to complete. Here’s what the page will look like:
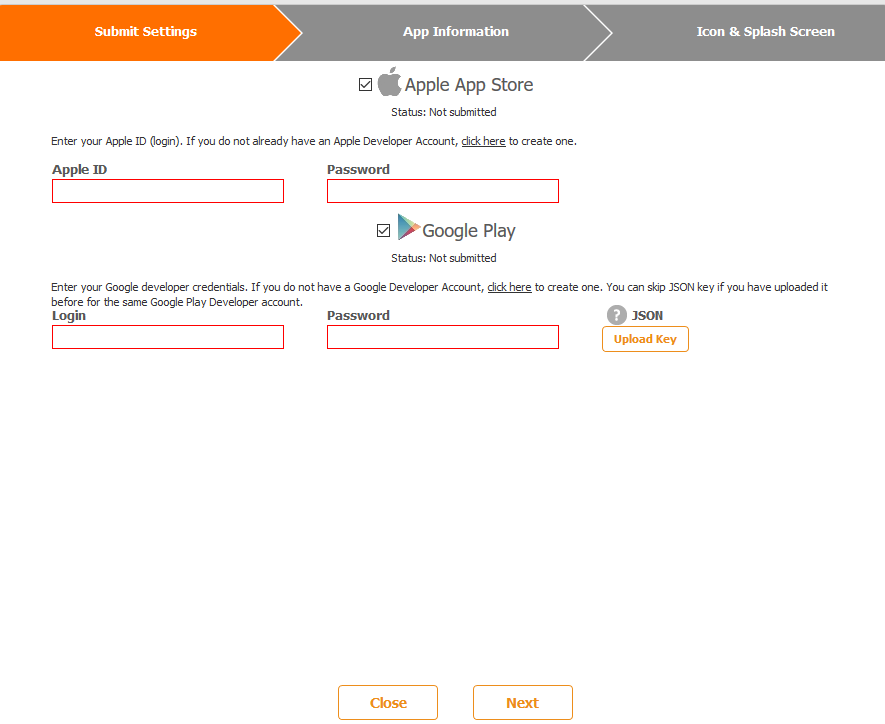
The publisher gives you the option of publishing to only one store if you want, but most people will publish to both just to expand their market that much more. Note that if you change your passwords on one of the accounts, you’ll need to either let us know or resubmit the app yourself.
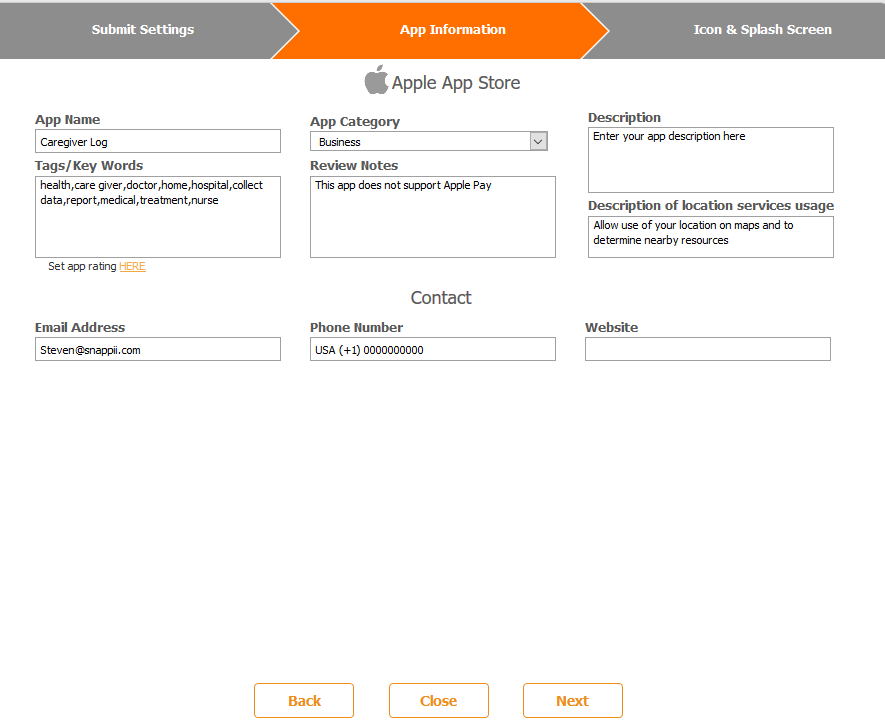
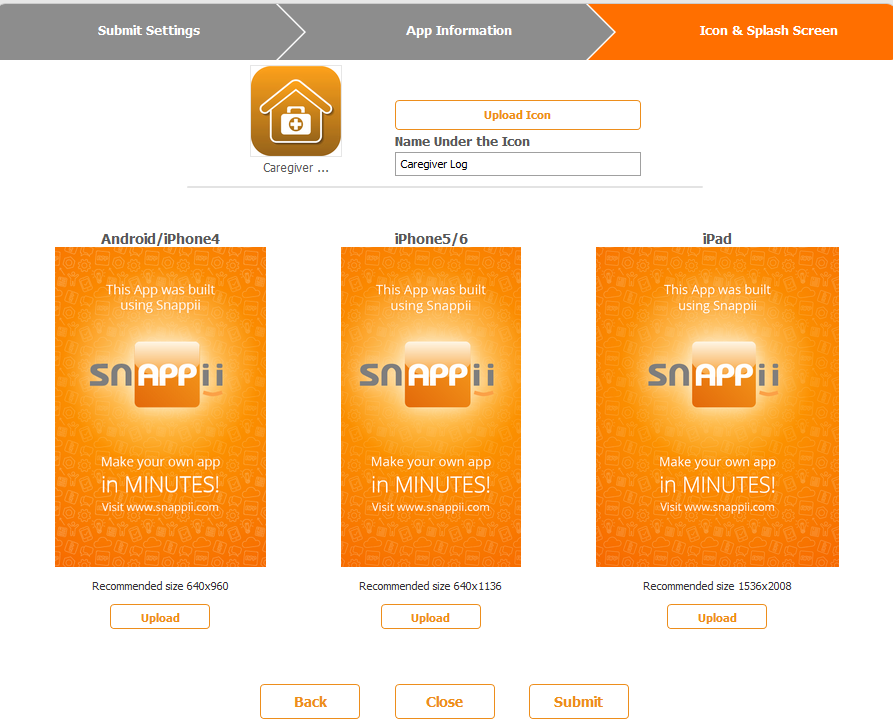
Next is the app information. This is the information you see in the store when you’re browsing for an app. The description, tags and contact information can all be manipulated from this dialog, but you can also go into your developer account if you want to do it through there (which some people prefer).
Last but not least is the splash screens. These are the screens your users will see when they look at the preview images in the app store. Remember, these are the first things your customers will see pertaining to your app, the first ‘inside look’ they’re exposed to – so make it count! Because phones generally have different resolutions, it’s recommended that you have an image for each resolution to make sure that whatever user is looking at it on the other side
Snappii puts the power in the user’s hands by enabling them to create their own mobile app using their powerful, zero-coding platform. The long task of putting together a mobile app can be reduced to minutes, and the cost brought down to a fraction of the original price. As a user, you also have access to our app templates, which are pre-made apps that you can customize to fit your needs. Or you can start it from scratch! Try it out today RISK FREE.

